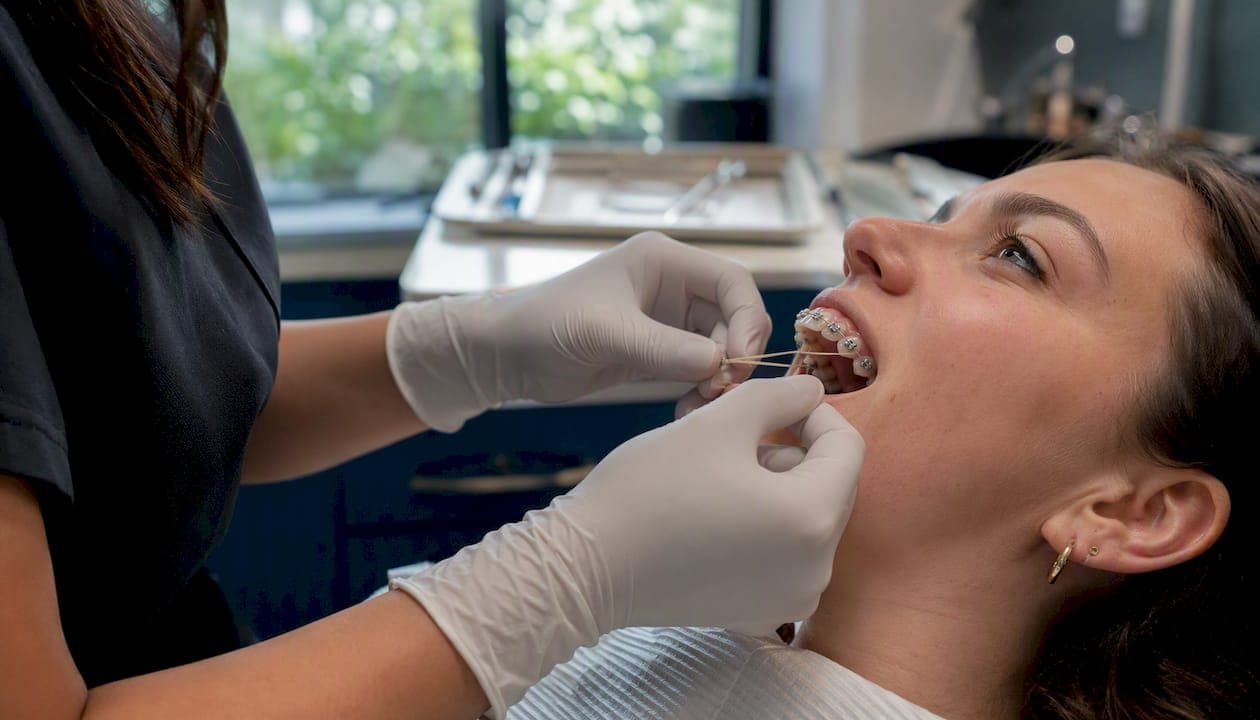
Invisalign elastics, clinically called orthodontic elastics or intermaxillary elastics, are small medical-grade rubber bands that attach between your upper and lower aligners to correct how your jaws fit together. While your aligners move individual teeth, the elastics handle something aligners alone cannot: the bite relationship between your upper and lower jaw. The American Association of Orthodontists confirms that elastics are a standard tool for correcting overbite, underbite, and crossbite. The single most important rule is straightforward: wear them as prescribed, typically around 20–22 hours per day, and remove them only to eat and brush.
- Who needs them: Patients with Class II overbite, Class III underbite, crossbite, midline shifts, or bite asymmetry
- How they attach: Via precision cuts in aligners, bonded buttons on teeth, or Invisalign SmartForce attachments
- Core rule: Wear as prescribed, replace at least every 12–24 hours, and remove for meals and oral hygiene
- Where to get guidance: DC Implant & Cosmetic Dentistry, led by Dr. Kambez Shukoor, provides elastic prescriptions, in-office supplies, and same-day appointments for attachment repairs
Key Takeaways
Invisalign elastics correct the bite relationship between your jaws, and wearing them consistently for 20–22 hours per day is the single factor that determines whether bite correction finishes on schedule.
| Point | Details |
|---|---|
| Daily wear target | Wear elastics 20–22 hours per day; remove only for eating, drinking, and oral hygiene. |
| Replacement frequency | Replace elastics at least every 12–24 hours; they lose 30–40% of force within the first 4–6 hours of wear. |
| Broken or lost button | Stop wearing elastics on that side immediately and contact your provider for rebonding. |
| Pain threshold | Mild soreness for 2–5 days is normal; sharp or persistent pain beyond one week requires a provider call. |
| Dc-dentistry support | DC Implant & Cosmetic Dentistry offers same-day elastic repairs, in-office elastic supply, and ClinCheck reviews for bite correction cases. |
Table of Contents
- What are Invisalign elastics and why does your orthodontist prescribe them?
- How do Invisalign elastics work with your aligners?
- How to put on and remove Invisalign elastics safely
- What is the recommended daily wear time and how long will you need elastics?
- Hygiene, appearance, and comfort while wearing elastics
- Common mistakes and troubleshooting your elastic wear
- When are elastics not used, and what are the alternatives?
- Red flags and when to contact your orthodontist
- What our practice tells patients about elastics
- Invisalign elastic support at DC Implant & Cosmetic Dentistry
- Sources
What are Invisalign elastics and why does your orthodontist prescribe them?
Aligners are precision tools for moving teeth within a single arch. They cannot, on their own, shift the jaw-to-jaw relationship. That is where elastics come in. By stretching between anchor points on your upper and lower teeth, they apply a continuous calibrated force that nudges the jaws into better alignment, something no aligner tray can do by itself. Healthline notes that skipping elastics can produce straight teeth that still fail to bite correctly, which is exactly the outcome patients want to avoid.
According to Dentalog, elastics are used in roughly 40–60% of Invisalign cases that involve bite correction, making them a common rather than exceptional part of treatment.
Common bite problems that trigger an elastic prescription:
- Class II (overbite): Upper front teeth protrude significantly past the lower
- Class III (underbite): Lower jaw sits forward of the upper
- Crossbite: One or more upper teeth sit inside the lower teeth
- Midline shift: The center lines of upper and lower teeth do not align
- Finishing and settling: Even after teeth are mostly aligned, elastics help seat the bite precisely
Elastics typically appear during the bite-correction phase of treatment, which can begin mid-plan or, in some cases, near the end for final settling. Your ClinCheck plan will map out when they start. The AAO's guidance on common bite problems is worth reading if you want a clearer picture of which category your case falls into.
Pro Tip: Some providers use a mandibular advancement feature built directly into the aligner trays, small wings that reposition the lower jaw without separate rubber bands. Ask your provider whether this option is part of your plan or whether traditional elastics are prescribed instead.
How do Invisalign elastics work with your aligners?
The mechanics depend on where the elastic hooks and which direction it pulls. Three main attachment options exist, and your provider chooses based on the force direction needed and how discreet you want the setup to be.
Attachment types:
- Precision cuts: Small notches built directly into the aligner tray that hold the elastic hook. No bonding required, and they disappear when you remove the tray.
- Bonded buttons: Small tooth-colored or metal anchors bonded directly to a tooth surface. They stay on the tooth even when the aligner is out, giving a more stable anchor point for stronger forces.
- Invisalign SmartForce attachments: Tooth-colored composite shapes bonded to teeth that help aligners grip and move teeth more precisely. They can also serve as anchor points for elastics.
Common elastic configurations and what they do:
- Class II elastics: Run from an upper front or canine hook to a lower molar hook, pulling the lower jaw forward relative to the upper. Used for overbite correction.
- Class III elastics: Run the opposite direction, from a lower front hook to an upper molar hook, pushing the upper jaw forward. Used for underbite.
- Cross elastics: Run diagonally across the bite to correct a unilateral crossbite on one side.
- Vertical/settling elastics: Run straight up and down between upper and lower teeth to help the bite seat evenly at the end of treatment.
Visibility is a real consideration. Precision cuts and clear elastics are the most discreet combination. Bonded metal buttons are more visible but provide stronger anchorage when the force demand is high. Tooth-colored buttons sit somewhere in between. Placement also matters: hooks near the back molars are nearly invisible in conversation, while front-tooth hooks are more noticeable.
Force direction at a glance: Class II elastics pull forward (lower jaw toward upper front); Class III elastics pull backward (upper jaw toward lower front); cross elastics pull diagonally to close a lateral gap. Picture a triangle drawn between the anchor points, and the elastic is the hypotenuse applying tension along that line.
How to put on and remove Invisalign elastics safely
The goal is even, symmetrical force on both sides of your mouth. Uneven placement, or skipping one side, creates asymmetric pressure that can slow progress or cause discomfort.
- Wash your hands thoroughly before touching your aligners or elastics.
- Seat your aligners fully on both arches before attaching elastics. A poorly seated tray changes the anchor point geometry.
- Hook the elastic on the upper anchor first (precision cut or button), then stretch it down to the lower anchor. Use your fingertip or the small plastic hook tool your provider may supply.
- Repeat on the other side immediately. Never wear an elastic on one side only unless your provider has explicitly prescribed asymmetric wear.
- Check symmetry in a mirror. Both elastics should look the same length and sit at the same angle.
- Remove elastics before eating by unhooking from one anchor and discarding. Never eat with elastics in; food debris and chewing forces will snap them and can dislodge bonded buttons.
- After eating and brushing, fit fresh elastics before reinserting your aligners (or after, depending on your provider's instruction for your attachment type).
Troubleshooting during placement:
- If one side snaps during placement, replace both sides with fresh elastics, not just the broken one. Replacing only one side means unequal force from a fresh band versus a stretched one.
- Practice in front of a mirror for the first few days. The motion becomes automatic within a week.
- If elastics snap repeatedly during normal wear (not just placement), the size or force class may need adjustment. Note how often it happens and tell your provider.
Pro Tip: Carry a small labeled pill organizer or a zip-lock bag with at least six spare elastics at all times. Elastics break at inconvenient moments. Storing them in a shirt pocket or loose in a bag exposes them to heat and lint, which degrades the latex. A small case keeps them clean and ready.
What is the recommended daily wear time and how long will you need elastics?
Wear elastics roughly 20–22 hours per day, the same target as your aligners. The force they apply is continuous and cumulative. Taking them out for a few extra hours each day does not just slow things down proportionally; it can reset progress because the jaw relationship has time to drift back.
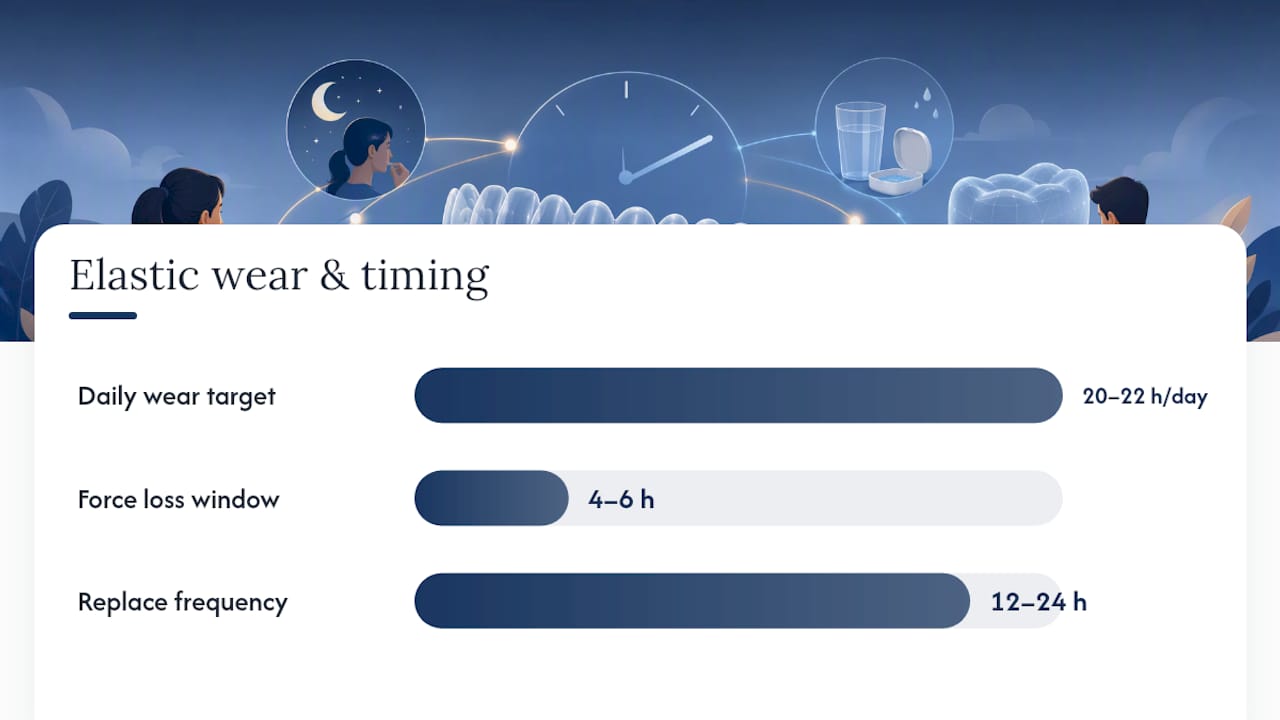
Replacement frequency matters more than most patients expect. Dentalog reports that elastics can lose approximately 30–40% of their force within the first 4–6 hours of use due to stretching and saliva exposure. Clinicians commonly advise replacing elastics at least every 12–24 hours. Many patients replace them after every meal, which conveniently aligns with the removal-for-eating rule.
Key wear schedule points:
- Remove only for eating, drinking anything other than water, and brushing or flossing
- Replace with a fresh pair after every meal and brushing session
- Never reuse an elastic you have already removed; it has lost significant tension
- If you forget to wear them for a full day, do not double up to compensate. Resume normal wear and mention the gap at your next check-in
How long will you need them? Most bite-correction cases use elastics for roughly 3–9 months, though the range varies considerably. A mild midline shift might resolve in 8–10 weeks. A significant Class II overbite can take longer, especially if the case requires refinement trays. Your ClinCheck timeline will give you a phase estimate, and your provider will reassess at each progress check.
Timeline in brief: elastic phase begins mid-treatment → mid-point check confirms bite movement → refinement trays may extend elastic use → final settling elastics close out the bite correction.
Hygiene, appearance, and comfort while wearing elastics
Remove elastics before eating or drinking anything other than plain water. That single habit protects both the elastics and your bonded buttons. Food acids and heat degrade latex quickly, and chewing forces can snap a band or pop a button off a tooth.
Cleaning your aligners and buttons:
- Rinse aligners with cool water every time you remove them. Hot water warps the plastic.
- Clean aligners with a soft toothbrush and mild, unscented soap. Avoid toothpaste, which is abrasive enough to scratch the surface and create clouding.
- Bonded buttons collect plaque at the base. Brush around them gently with a soft-bristle brush at every brushing session. For a deeper clean of removable appliances, the methods in this retainer cleaning guide translate directly to aligner hygiene.
- Clear elastics stain from coffee, tea, and red wine within hours. If you drink these regularly, replace elastics immediately after rather than waiting until the next meal.
Managing initial soreness:
Mild soreness for the first 2–5 days after starting elastics is normal. The jaw muscles are adjusting to a new force vector. Over-the-counter pain relievers like ibuprofen or acetaminophen taken as directed handle most of it. A cold compress against the jaw for 10–15 minutes can also reduce inflammation. DentalNation notes that sharp or persistent pain beyond about a week is not normal and warrants a call to your provider. The tightness and comfort strategies used for retainers apply here too: give your jaw a few days before concluding something is wrong.

Pro Tip: Store spare elastics away from heat. A car glove compartment in summer can reach temperatures that degrade latex in hours. Keep your backup supply in a room-temperature bag or case, and check that the elastics feel firm and snappy before using them. A limp, easily stretched elastic has already lost most of its working force.
Common mistakes and troubleshooting your elastic wear
The Braces Guide identifies inconsistent wear as the leading cause of delayed or incomplete bite correction. Most problems trace back to a handful of predictable habits.
Mistakes to avoid:
- Skipping wear for hours or days and then doubling up elastics to "catch up" (this applies excessive, uncontrolled force)
- Replacing only the broken side when one snaps (creates uneven force)
- Eating with elastics in
- Storing elastics in heat or loose in a pocket
- Wearing elastics after a bonded button has come off
Troubleshooting checklist:
- One elastic snaps during the day: Replace both sides with fresh elastics immediately.
- Elastics snap repeatedly (more than once or twice a week): The force class may be too heavy for your current attachment setup. Log the frequency and report it at your next appointment.
- A bonded button falls off: Stop wearing elastics on that side immediately. The Braces Guide is clear on this: continuing with a missing anchor creates asymmetric forces that can cause pain and move teeth in the wrong direction. Contact your provider for rebonding.
- Elastics feel loose or limp after a short time: They have degraded, possibly from heat exposure or a bad batch. Switch to a fresh supply.
- Pressure feels uneven side to side: Check that both elastics are hooked at the same anchor points and are the same size. If the asymmetry persists after correcting placement, call your provider.
When to stop and call your provider immediately: severe swelling, numbness that does not resolve within a day, a loose or broken bonded button, or pain that is sharp rather than dull and does not improve after 48 hours.
When are elastics not used, and what are the alternatives?
Not every Invisalign case needs elastics. Cases involving only mild crowding or spacing, with no significant bite discrepancy, often complete without them. When bite correction is needed but elastics are not the right fit, providers have several options.
Alternatives your provider might use:
- Mandibular advancement wings: Built into the aligner trays themselves, these small plastic ramps reposition the lower jaw forward during wear. Commonly used for Class II correction in adolescents and younger adults. No separate rubber bands required.
- Staging and torque adjustments: For minor bite issues, the ClinCheck plan can be designed to address the bite through careful tooth movement sequencing rather than interarch force.
- Bonded fixed appliances: In cases where elastics alone cannot generate enough anchorage, a provider may bond a fixed palatal expander or a temporary anchorage device (TAD) to supplement aligner mechanics.
- Referral for orthognathic surgery: Severe skeletal discrepancies, where the jaw bones themselves are significantly misaligned, may require surgical correction that no aligner or elastic can replicate.
From a patient perspective, mandibular advancement wings are the most comfortable alternative since they require no separate bands and are built into the tray. Fixed appliances are more effective for complex anchorage needs but are visible and less comfortable. Surgery is a last resort for skeletal cases. Your provider's recommendation will depend on the severity of the bite problem, your age, and how much tooth movement is still needed.
Red flags and when to contact your orthodontist
Contact your provider if pain is sharp, persistent beyond one week, or accompanied by swelling. That threshold, confirmed by DentalNation's clinical Q&A, separates normal adaptation soreness from a sign that something in the force setup needs adjustment.
Concrete red flags:
- Severe or worsening swelling around a bonded button or attachment
- Numbness in the jaw, lips, or teeth that persists beyond 24 hours
- A bonded button that has come loose or fallen off entirely
- Asymmetric pressure that causes pain on one side only
- Elastics that snap more than once or twice per week without obvious cause
- Any sign of infection: redness, warmth, discharge, or fever
What your provider will do at the appointment: rebond loose buttons, check that the elastic force class matches your current treatment stage, adjust the attachment configuration if needed, or revise the ClinCheck plan if bite progress has stalled. These are routine adjustments, not setbacks.
Pro Tip: At DC Implant & Cosmetic Dentistry, Dr. Kambez Shukoor's team provides spare elastics at every appointment and walks patients through placement before they leave the office. If a bonded button comes off between visits, same-day appointments are available for rebonding so treatment momentum is not lost. The practice holds over 200 five-star reviews, and prompt troubleshooting support is a consistent theme in patient feedback. Reach the practice directly through Dc-dentistry for urgent elastic or attachment concerns.
What our practice tells patients about elastics
The question we hear most often is some version of: "Do I really have to wear them that much?" The honest answer is yes, and the patients who commit to consistent wear from day one finish faster and with better bite results than those who treat elastics as optional. Adaptation takes about a week. After that, most patients barely notice them.
We send every patient home with a supply of spare elastics and a clear demonstration of placement before they leave the chair. If something goes wrong between appointments, whether a button pops off or the elastics feel wrong, we offer same-day appointments for repairs and checks. You should never be left guessing whether to keep wearing them or stop.
Invisalign elastic support at DC Implant & Cosmetic Dentistry
Getting elastic guidance right from the start saves weeks of treatment time. At DC Implant & Cosmetic Dentistry in Washington, DC, Dr. Kambez Shukoor's team handles the full scope of clear aligner treatment, including elastic prescriptions, in-office elastic supply, bonded button repairs, and ClinCheck reviews when bite progress needs a closer look.
Same-day appointments mean a broken button or a question about your wear schedule does not have to wait until your next scheduled visit. The practice also offers refinement planning for cases where the bite correction phase needs adjustment. For patients managing costs, financing through CareCredit and Lending Tree is available. Read up on the 30-minute rule for Invisalign for another practical wearing habit that pairs directly with elastic compliance. To book a consultation or get a same-day repair appointment, visit Dc-dentistry.
Sources
- Orthodontic elastics | American Association of Orthodontists (AAO)
- Invisalign rubber bands: How they work and why they help | Healthline
- Invisalign Elastics (Rubber Bands) Explained: Purpose, Placement, Wear Time & Bite Correction Guide | Boston Orthodontics
This article is general information, not a substitute for advice from a qualified doctor. Consult a qualified healthcare professional about your own circumstances before acting on anything here.