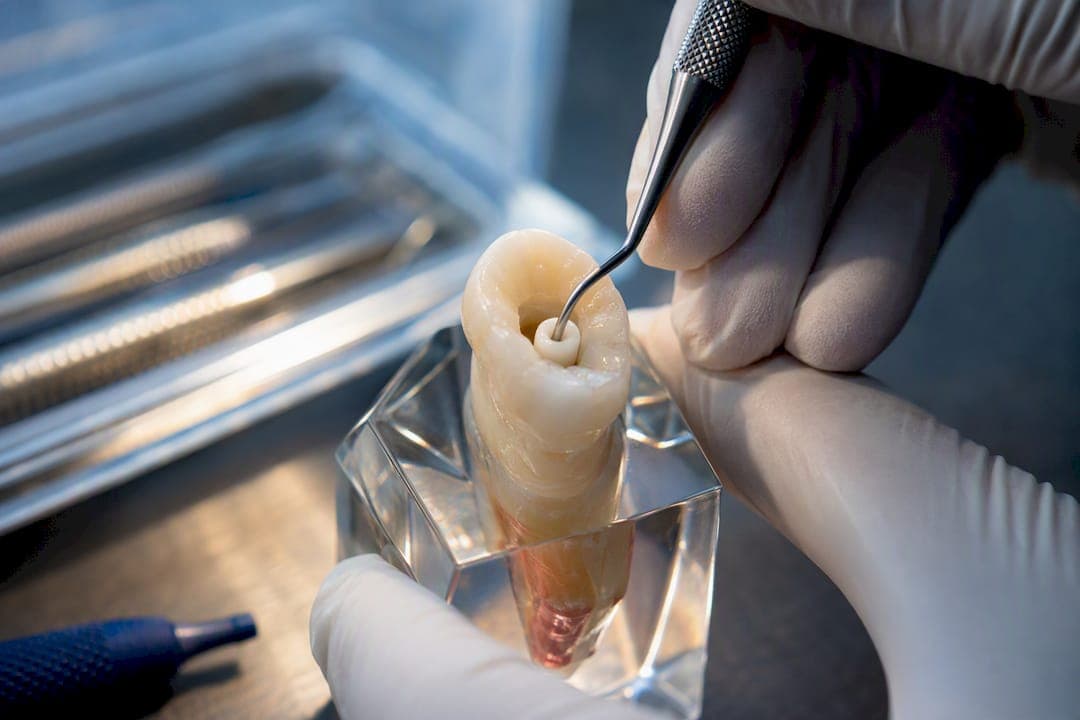
Internal bleaching works well for most non-vital teeth that have darkened after a root canal or trauma, and the walking bleach technique is the safest, most predictable way to do it. A dentist seals a bleaching agent, usually sodium perborate or hydrogen peroxide, inside the tooth's pulp chamber behind a protective barrier and lets it sit between visits. The single non-negotiable step is a 2 mm intraorifice barrier of glass ionomer cement placed over the root filling before any bleaching agent goes in. Skip that barrier, and the risk of a serious complication called external cervical resorption climbs.
TL;DR:
- The success of internal bleaching depends more on the timing of discoloration than the technique used, with teeth discolored for months being less responsive.
- Proper barrier placement, especially a 2 mm intraorifice barrier of glass ionomer cement, is crucial to prevent external cervical resorption during bleaching.
- Walking bleach, performed over multiple short visits with sodium perborate, is the safest and most predictable method, while heat-activated in-office bleaching is now largely avoided.
- Discoloration caused by trauma or necrosis responds more reliably than stains from metallic materials or restorative residues.
- A thorough case assessment, including radiographs and shade comparison, helps determine if bleaching is suitable or if restorative options are more appropriate.
Table of Contents
- When Is Internal Bleaching the Right Call?
- Walking Bleach, Inside-Outside, or In-Office: Which Technique Wins?
- The Walking Bleach Protocol, Step by Step
- What Can Go Wrong, and How Dentists Prevent It
- How Long Do Results Last?
- Taking Care of the Tooth Between and After Sessions
- What to Expect From a Consultation for a Discolored Tooth
- Why the Conservative Approach Deserves More Credit Than It Gets
- Ready to Address a Discolored Tooth? Here's How to Start
- Sources
When Is Internal Bleaching the Right Call?
A tooth turns gray, yellow, or brown from the inside for a handful of predictable reasons: blunt trauma that kills the nerve, pulp necrosis, blood breakdown products seeping into dentin, or leftover endodontic materials staining the tooth structure from within. In most of these cases, the tooth has already had a root canal, or needs one before bleaching can start.
Non-vital, root-filled front teeth make up the overwhelming majority of good candidates. The discoloration sits inside the dentin, which means whitening from the outside barely touches it. Bleaching from within the pulp chamber reaches the stain at its source.
Not every discolored tooth responds the same way. Some tetracycline staining and discoloration caused by certain restorative materials, like amalgam residue, resist bleaching or fade unpredictably, and experts note the underlying cause of staining matters more than most patients expect: trauma and necrosis-related stains generally lighten more reliably than stains tied to metallic or material sources.
Before recommending internal bleaching, a dentist typically checks:
- Periapical radiographs to confirm the root canal filling is complete and free of leakage
- Quality of the existing obturation, since a poorly sealed canal complicates the barrier placement
- Signs of resorption, periapical pathology, or infection that need treatment first
- A shade comparison against the neighboring, unaffected tooth to set a realistic target
When the tooth already has extensive structural damage, a large existing restoration, or a fracture, a crown or veneer often makes more sense than bleaching, since bleaching only changes color, not structural integrity.
Walking Bleach, Inside-Outside, or In-Office: Which Technique Wins?
Three main approaches exist, and they are not equally recommended.
Walking bleach is the technique most dentists reach for first. The agent gets sealed inside the tooth and left to work between appointments, typically one to two weeks apart. It requires less chair time per visit, gives the chemical time to act gradually, and avoids the complications tied to heat-based methods. Clinical guidance from StatPearls identifies walking bleach as favored specifically because it is predictable and comfortable for patients when isolation and barrier placement are done correctly.
Inside-outside bleaching combines the internal walking-bleach approach with a take-home tray for external whitening, usually with a lower-concentration carbamide peroxide gel. It can speed up overall results and blend the internal tooth with surrounding teeth more evenly, but it depends heavily on the patient actually wearing the tray as directed. Compliance, not chemistry, is usually what makes or breaks this method.
In-office thermocatalytic or photo-activated bleaching used to be common: apply a stronger peroxide concentration and speed the reaction with heat or light. That approach has fallen out of favor. A critical review of walking bleach protocols found that heating bleaching agents raises free radical formation and correlates with a higher risk of external cervical resorption. Modern protocols steer away from heat activation almost entirely.
On agent choice, the evidence is reassuring: it doesn't matter as much as people assume. A randomized clinical trial comparing walking bleach, in-office, and combined techniques found no statistically significant difference in success rates between them. Time elapsed since the root canal affected outcomes more than the technique itself.
Statistic callout: The same trial found technique choice was less predictive of bleaching success than how long the tooth had been discolored, a detail that gets lost in most consumer guides to whitening.
A quick comparison of the agents themselves:
- Sodium perborate mixed with water is the workhorse of walking bleach: effective, well-tolerated, and considered one of the safer options for repeated intracoronal use.
- Hydrogen peroxide works faster but at high concentrations (around 30%) carries more risk of tissue irritation, and clinical descriptions caution against routine use of very high concentrations for that reason.
- Carbamide peroxide breaks down into hydrogen peroxide and urea, acting more slowly and gently, which makes it a common choice for inside-outside protocols using take-home trays.
The Walking Bleach Protocol, Step by Step
Here's what actually happens in the chair, from the first appointment to the final restoration.
- Diagnosis and consent. The dentist takes periapical radiographs, records a baseline shade, and rules out active infection or resorption. Informed consent covers realistic outcomes, the number of sessions likely needed, and alternatives like veneers.
- Isolation and mucosal protection. A rubber dam goes on, and the gum tissue around the tooth gets coated with a barrier like Orabase or Vaseline. Wedges or ligatures reinforce the seal, since any peroxide contact with soft tissue can cause a chemical burn.
- Access and cleaning. The dentist reopens the access cavity and removes about 2 mm of the gutta-percha root filling from the top of the canal, then disinfects the pulp chamber, often with sodium hypochlorite, and dries it thoroughly.
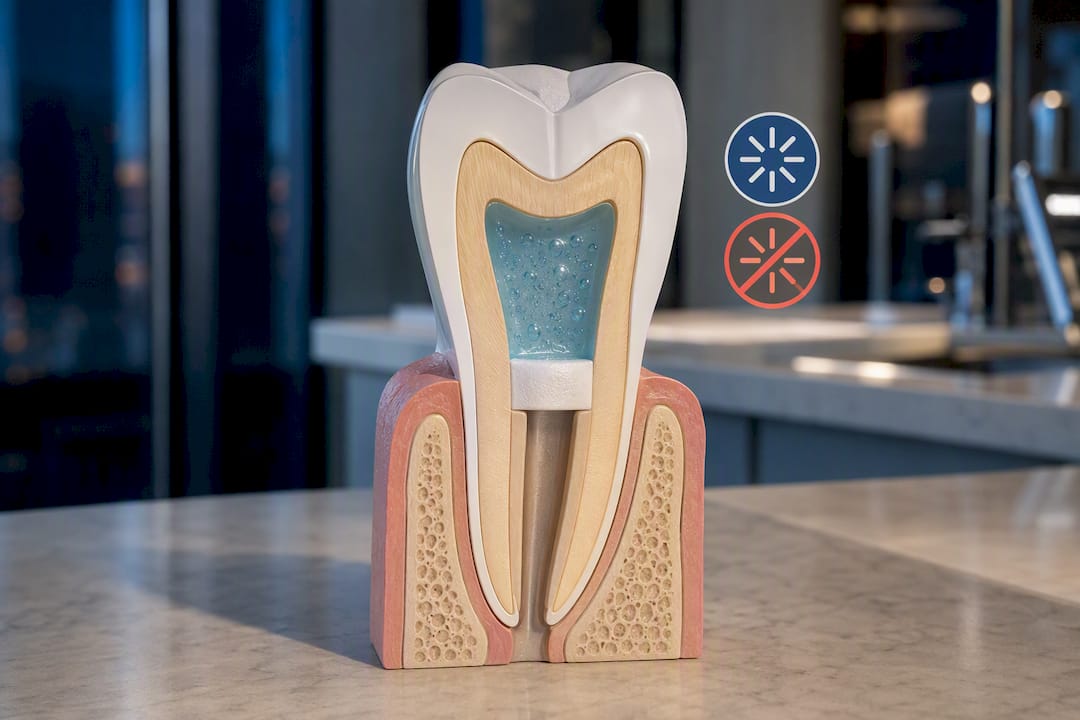
- Barrier placement. This is the step that prevents complications. A 2 mm layer of glass ionomer cement (IRM, composite, or MTA are also used) gets packed directly over the remaining root filling. That thickness matters because a barrier that's too thin lets peroxide diffuse down into the dentinal tubules and toward the periodontal ligament, which is the mechanism believed to drive external cervical resorption.
- Paste placement. Sodium perborate mixed with water, or occasionally a lower-concentration hydrogen peroxide, gets packed into the pulp chamber above the barrier. The access opening is sealed with a temporary filling.
- Follow-up and repeat. The patient returns in one to two weeks. If the shade hasn't reached the target, the dentist replaces the paste and repeats the cycle, sometimes for two or three rounds.
- Final restoration. Once the shade holds steady, the paste is removed, the chamber is cleaned, and a permanent, tooth-colored restoration seals the access cavity for good.
Pro Tip: Ask your dentist to show you the shade guide comparison at each visit. Seeing the tooth lighten side by side with the shade tab keeps expectations grounded and makes it obvious when you've reached a realistic stopping point rather than chasing a shade that will never match naturally.
What Can Go Wrong, and How Dentists Prevent It
The complication that gets the most attention in dental literature is external cervical resorption, a process where the body starts resorbing tooth structure near the gumline, often years after bleaching. It's associated with peroxide diffusing through an inadequate or missing intraorifice barrier and with heat-activated techniques that speed up radical formation. That's why a 2 mm barrier and a hard "no" on heat activation aren't optional extras. They're the two safety measures the entire modern protocol is built around.
Mucosal chemical burns are the other real risk, and they come from poor isolation rather than the bleaching agent itself. A rubber dam plus a protective coating on the gum tissue prevents nearly all of these.
Patients sometimes notice mild, transient sensitivity after a session, particularly if the temporary filling isn't perfectly sealed. That typically resolves within a day or two and isn't a sign of a deeper problem.
- Watch for pink or dark discoloration near the gumline months after treatment, a possible early sign of resorption.
- Persistent throbbing pain, rather than mild sensitivity, warrants a call to the dentist.
- Swelling or a bad taste from the temporary filling can signal a seal failure.
- If the tooth doesn't respond after three or four sessions, it's time to reassess rather than keep repeating the same protocol.
When resorption, infection, or a failed seal shows up, the next step is usually endodontic reassessment, sometimes retreatment of the canal, and in more advanced cases a referral to a specialist before any further bleaching is attempted.
How Long Do Results Last?
Short-term success rates for internal bleaching are high, but "success" depends heavily on why the tooth discolored in the first place and how long it sat that way before treatment.
- Teeth discolored recently, from trauma or a fairly fresh root canal, tend to lighten faster and more predictably than teeth that have been dark for years.
- Most patients need multiple walking-bleach cycles, spaced some weeks apart, before the shade plateaus.
- A plateau usually means the accessible pigment has been broken down; further sessions rarely add much beyond that point.
- Results can fade over time, especially when the original discoloration came from a restorative material rather than blood breakdown products, which is why periodic checkups matter.
- Oral habits, like heavy coffee or tobacco use, and the restorative material used to seal the access cavity both influence how long the lightened shade holds.
If a tooth has significant structural loss, a large old filling, or a shade that keeps drifting back despite repeated bleaching, a veneer or crown becomes the more durable long-term fix. Veneers in particular hold color far more consistently than natural tooth structure, though it's worth knowing that porcelain veneers themselves can pick up surface stains over time if oral hygiene lapses.
Taking Care of the Tooth Between and After Sessions
The temporary filling placed between walking-bleach visits is not meant to withstand hard chewing, so stick to the softer side of your diet on that tooth until the permanent restoration goes in. Mild sensitivity after a session is normal and usually fades within a day.
If your protocol includes an inside-outside tray for external whitening, avoid coffee, red wine, and other heavy staining foods while wearing it, the same "white diet" guidance used for any external whitening treatment.
- Expect check-ins every one to two weeks while the walking bleach is actively working.
- Once the final restoration is placed, plan a follow-up review at six to twelve months to check shade stability and tissue health.
- Call the dentist promptly for persistent pain, new swelling, or any pink or gray discoloration near the gumline that could point to resorption.
Pro Tip: Keep a photo of your tooth's shade at the start of treatment. It's the easiest way to objectively track fading months later instead of relying on memory, which tends to exaggerate how "white" a tooth used to look.
What to Expect From a Consultation for a Discolored Tooth
At a same-day evaluation, a dentist reviews the tooth's history, radiographs, and root canal status before recommending internal bleaching or a restorative alternative. Cases seen in practice range from a single darkened front tooth after a childhood fall to older root-filled teeth that have slowly grayed over years. The decision between bleaching and a crown or veneer usually comes down to how much healthy tooth structure remains and how the patient wants to invest their time and budget.
Why the Conservative Approach Deserves More Credit Than It Gets
The biggest misconception about internal bleaching is that it's a quick cosmetic fix, roughly equivalent to whitening strips for a single tooth. It isn't. It's a staged clinical procedure where the barrier placement matters more than the whitening agent itself, and that fact gets buried in a lot of consumer content that focuses on "which chemical whitens best."
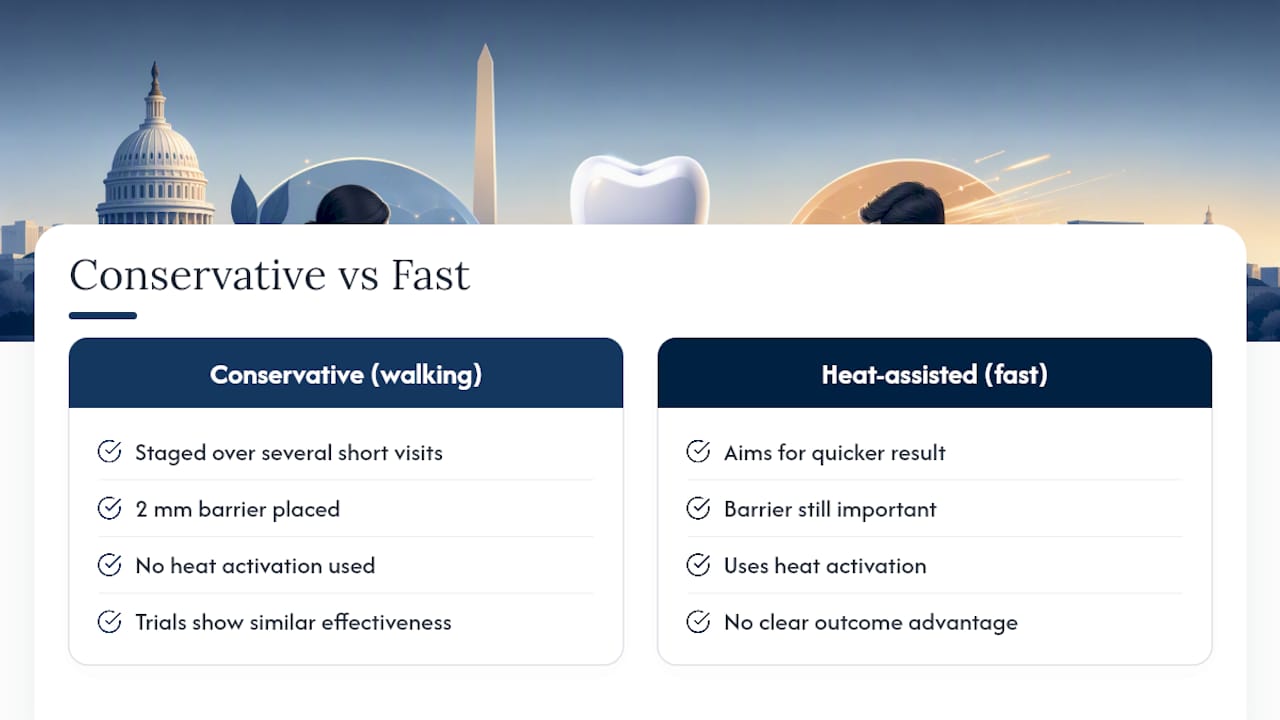
The research backs a specific bias: walking bleach, done patiently over several short visits with a proper 2 mm barrier, beats rushing toward a faster, heat-assisted result. The data showing no significant difference in outcomes between techniques should reassure patients that they're not missing out by choosing the slower, safer route. If anything, the trial data suggests patience with timing, specifically how long the discoloration has been present, matters more to the outcome than which method a dentist chooses.
What patients should prioritize first isn't the whitening agent. It's asking whether the dentist plans to place an adequate barrier and whether they're avoiding heat activation altogether. Those two questions tell you more about the safety of your treatment than any brand name on a bleaching gel.
— Jake
Ready to Address a Discolored Tooth? Here's How to Start
A darkened tooth after a root canal doesn't have to mean a crown right away. DC Implant & Cosmetic Dentistry evaluates each case individually, checking whether the tooth is a strong candidate for conservative internal bleaching before recommending anything more invasive, and same-day consultations mean you get answers without weeks of waiting.

A first visit typically includes a radiograph review, a shade assessment against neighboring teeth, and a straightforward conversation about whether walking bleach or a restorative option like a veneer fits your situation and budget better. For patients weighing costs, financing options may be available to spread out treatment expenses rather than delaying care. If you've been living with a single dark tooth and wondering whether it can be fixed without a crown, schedule a whitening consultation and get a direct answer on your candidacy.
This article is general information, not a substitute for advice from a qualified doctor. Consult a qualified healthcare professional about your own circumstances before acting on anything here.
Sources
- Internal Tooth Whitening - StatPearls - NCBI Bookshelf
- Clinical Testing of Walking Bleach, In-Office, and Combined Bleaching of Endodontically Treated Teeth
- Review of the current status of tooth whitening with the walking bleach technique (DOI)